
How to Stop Diagonal Two-Finger Scrolling on macOS (Lock Trackpad Scrolling to One Axis)

If you use a MacBook trackpad, you may have noticed an annoying behavior on web pages that can scroll both vertically and horizontally: when you move two fingers mostly up or down, even a tiny sideways movement can make the page drift left or right. The opposite can happen during horizontal scrolling too.
What you probably want is simple: when a two-finger scroll gesture starts, macOS should decide whether you meant to scroll vertically or horizontally, then ignore movement on the other axis until you lift your fingers.
This behavior is usually called scroll axis locking or axis lock. macOS Sequoia does not provide a built-in setting for it, but you can add it globally with Hammerspoon.
What this fix does
With this setup:
- If a gesture starts mostly vertically, horizontal movement is ignored until the gesture ends.
- If a gesture starts mostly horizontally, vertical movement is ignored until the gesture ends.
- Horizontal scrolling is not disabled: it still works when you deliberately start a horizontal gesture.
- The behavior applies system-wide, not only to your web browser.
This is especially useful on websites with horizontally scrollable elements, wide tables, carousels, timelines, code blocks, kanban boards, or other layouts where a small diagonal trackpad movement can shift the page unexpectedly.
Install Hammerspoon
Download and install Hammerspoon from its official website:
Launch it once. macOS may ask you to give Hammerspoon permission under:
System Settings → Privacy & Security → Accessibility
Enable Hammerspoon there. This permission is required because the script needs to inspect and modify scroll events.
Create the Hammerspoon configuration
Hammerspoon reads its configuration from:
~/.hammerspoon/init.luaCreate that file if it does not already exist, then paste the following code into it:
-- Trackpad Scroll Axis Lock
--
-- Each new two-finger scroll gesture is locked to its
-- dominant axis: vertical OR horizontal.

local eventtap = hs.eventtap
local event    = hs.eventtap.event
local props    = event.properties

local lockedAxis = nil

-- 1.0 = choose the mathematically dominant axis.
-- 1.10 = slightly favor vertical scrolling.
-- Increase this value if you mostly scroll vertically
-- and want horizontal scrolling to require a clearer gesture.
local verticalBias = 1.10

local function zeroHorizontal(e)
    e:setProperty(props.scrollWheelEventDeltaAxis2, 0)
    e:setProperty(props.scrollWheelEventFixedPtDeltaAxis2, 0)
    e:setProperty(props.scrollWheelEventPointDeltaAxis2, 0)
end

local function zeroVertical(e)
    e:setProperty(props.scrollWheelEventDeltaAxis1, 0)
    e:setProperty(props.scrollWheelEventFixedPtDeltaAxis1, 0)
    e:setProperty(props.scrollWheelEventPointDeltaAxis1, 0)
end

scrollAxisLock = eventtap.new(
    { event.types.scrollWheel },
    function(e)

        local phase =
            e:getProperty(props.scrollWheelEventScrollPhase)

        local momentumPhase =
            e:getProperty(props.scrollWheelEventMomentumPhase)

        -- A new gesture has started.
        if phase == 1 then
            lockedAxis = nil
        end

        local dy =
            e:getProperty(props.scrollWheelEventFixedPtDeltaAxis1)

        local dx =
            e:getProperty(props.scrollWheelEventFixedPtDeltaAxis2)

        -- On the first real movement, choose the axis.
        if lockedAxis == nil and (dx ~= 0 or dy ~= 0) then

            local absX = math.abs(dx)
            local absY = math.abs(dy)

            if absX > absY * verticalBias then
                lockedAxis = "horizontal"
            else
                lockedAxis = "vertical"
            end
        end

        -- Completely remove movement on the other axis.
        if lockedAxis == "vertical" then
            zeroHorizontal(e)

        elseif lockedAxis == "horizontal" then
            zeroVertical(e)
        end

        -- Reset after momentum scrolling ends.
        if momentumPhase == 3 then
            lockedAxis = nil
        end

        -- Reset if the gesture is cancelled.
        if phase == 8 then
            lockedAxis = nil
        end

        -- Let the modified event continue to the application.
        return false
    end
)

scrollAxisLock:start()
Reload the configuration
If Hammerspoon opens only the Hammerspoon Console, that is fine. Type this command into the console and press Return:
hs.reload()Hammerspoon will immediately reload ~/.hammerspoon/init.lua.
You can close the Hammerspoon Console window afterward. Closing the console does not quit Hammerspoon and does not stop the scroll filter. Just avoid choosing Quit Hammerspoon, because that would stop the script.
Make Hammerspoon start automatically when you log in
Run this once in the Hammerspoon Console:
hs.autoLaunch(true)To check whether automatic launch is enabled, run:
hs.autoLaunch()If the console returns:
trueHammerspoon is configured to start automatically when you log in to macOS.
Optional: show a confirmation when the script loads
If you want a visible confirmation whenever the configuration is loaded, add this line to the end of init.lua:
hs.alert.show("Scroll Axis Lock enabled")Each time Hammerspoon starts or you reload the configuration, a small notification will appear briefly.
Optional: add a keyboard shortcut to reload Hammerspoon
If you expect to tweak the script, add this to init.lua:
hs.hotkey.bind({"cmd", "alt", "ctrl"}, "R", function()
    hs.reload()
end)
You can then reload the configuration at any time with:
Command + Option + Control + R
Adjust how easily horizontal scrolling is selected
The most useful setting to tune is:
local verticalBias = 1.10At 1.0, the script simply chooses whichever axis has the larger initial movement.
local verticalBias = 1.0If you mostly scroll vertically and want accidental horizontal scrolling to be even less likely, try a higher value such as:
local verticalBias = 1.25With a higher value, a horizontal gesture must be more clearly horizontal before the script locks onto that axis.
How the axis lock works
Without this script, a slightly diagonal two-finger movement might produce a scroll event similar to:
Horizontal: +4
Vertical:   +12
A web page that supports scrolling in both directions can react to both values, so it moves vertically and sideways at the same time.
With axis locking enabled, the script sees that the vertical component dominates and changes the event to:
Horizontal: 0
Vertical:   +12
It keeps the horizontal component at zero for the rest of that gesture, even if your fingers drift slightly sideways. When you lift your fingers, the lock resets.
If the next gesture starts mostly horizontally, the opposite happens:
Horizontal: +15
Vertical:   0
This gives the trackpad a much more deliberate feel on pages and applications that can scroll in two dimensions.
Why not simply disable horizontal scrolling?
Disabling horizontal scrolling entirely would also prevent intentional two-finger horizontal scrolling. That can be inconvenient in wide documents, timelines, tables, image editors, spreadsheets, and other applications.
Axis locking is more useful because it keeps both directions available while preventing an individual gesture from wandering diagonally.
Result
After this configuration is active, every two-finger trackpad scroll gesture is effectively treated as either vertical or horizontal, never both at the same time.
If you arrived here because your Mac trackpad makes web pages move sideways while you are trying to scroll up or down, this is the behavior you were looking for: scroll axis locking.
(August 31, 2026)
How to Download a YouTube Video at Maximum Quality on Linux with yt-dlp
This tutorial shows how to download a YouTube video at the highest useful quality on Linux Mint 22 using yt-dlp, ffmpeg, and Deno. It also explains how to select specific video and audio streams when you want a standard MP4 file with H.264 video and AAC audio.
1. Install the latest yt-dlp
It is better to use the current official yt-dlp binary rather than an older package from the Linux distribution repositories:
sudo curl -L https://github.com/yt-dlp/yt-dlp/releases/latest/download/yt-dlp_linux -o /usr/local/bin/yt-dlp
sudo chmod a+rx /usr/local/bin/yt-dlp
hash -r
Check that the correct executable is being used:
which yt-dlp
yt-dlp --version
which yt-dlp should normally return:
/usr/local/bin/yt-dlp2. Install ffmpeg
ffmpeg is required to merge separate video and audio streams:
sudo apt update
sudo apt install ffmpeg
3. Install Deno
Recent YouTube extraction support in yt-dlp may require an external JavaScript runtime. Deno is a good choice:
curl -fsSL https://deno.land/install.sh | shDeno will prompt you to add itself to the current shell's PATH. Accept the prompt, then close and reopen the terminal.
Then verify the installation:
deno --version4. List the formats available for the video
Before downloading, inspect the available video and audio streams:
yt-dlp -F "https://youtube.com/watch?v=VIDEO_ID"The output contains a format ID for every available stream, together with information such as resolution, frame rate, codec, bitrate, language, and container.
For example, you may see several 1080p streams using different codecs:
avc1= H.264/AVCvp9= VP9av01= AV1
If your goal is broad compatibility with televisions, media players, phones, and video editors, H.264 video plus AAC audio inside an MP4 container is usually the safest choice.
5. Select the best H.264 video and the original AAC audio
In my example, the format list contained:
270— 1920x1080, 25 fps, H.264/AVC video140-1— original Italian audio, AAC, about 129 kb/s
I therefore downloaded those two streams explicitly:
yt-dlp -f "270+140-1" \
  --merge-output-format mp4 \
  -o "Intervista Francesco Galgani 23 agosto 2026.%(ext)s" \
  "https://youtube.com/watch?v=2kQZZ2thq3w"
yt-dlp downloads the selected video and audio streams separately and then asks ffmpeg to merge them into a single MP4 file.
Why not simply use the generic best-quality selector?
A generic command such as:
yt-dlp -f "bv*+ba/b" --merge-output-format mp4 "VIDEO_URL"is convenient, but the highest-quality stream selected by YouTube may use VP9 or AV1 instead of H.264. The resulting file can still use an .mp4 container, but codec compatibility may be lower on older devices or software.
By checking the format list first and selecting the H.264 video stream and AAC audio stream explicitly, you can keep the original streams without re-encoding while producing a highly compatible MP4 file.
Important note
Format IDs are specific to each YouTube video and can change. Do not assume that 270 and 140-1 will be correct for another video. Always run yt-dlp -F first and choose the format IDs that match the resolution, codec, audio language, and bitrate you want.
(August 26, 2026)
A Low-VRAM Approach to AI Watermark Removal on Linux
remove-ai-watermarks-low-vram is my unofficial adaptation of wiltodelta/remove-ai-watermarks designed to make AI-watermark removal practical on older NVIDIA hardware. I developed and tested it on a GeForce GTX 1050 with only 4 GB of VRAM, an Intel Core i7-7700HQ processor, and 16 GB of system memory.
The project addresses a practical problem: modern image-regeneration pipelines can require far more GPU memory than an older computer provides. Instead of requiring a new graphics card, this version uses CPU offloading, attention slicing, VAE slicing and tiling, selective model loading, and a completely optional face-processing stage. The original image is always preserved, while the processed copy receives a configurable suffix.
What the project provides
The repository contains the complete upstream application together with three Bash commands tailored to different situations:
cleanImage.shruns the complete pipeline, including face detection and face refinement. It is intended for systems with substantially more GPU memory and storage.cleanImageNoFace.shskips all face-related models and performs the global SDXL regeneration. This is the recommended general-purpose command for a 4 GB GPU.cleanImageNoFaceText.shalso skips face processing but adds experimental protection for small writing through PaddleOCR, LaMa, and crop-based Qwen-VAE reconstruction.
By default, the first two commands add _cleaned before the file extension. The text-preserving version adds _cleaned_text and creates a JSON report describing the text regions it processed. Existing outputs are never overwritten.
Why text needs special treatment
Invisible-watermark removal works by regenerating the image pixels. Even at a conservative strength, this can damage small letters because an image model treats them as visual shapes rather than as exact typography. Large decorative words integrated into an illustration are often preserved adequately, while captions, prices, footnotes, and other small text are more vulnerable.
The text-aware command first uses PaddleOCR to locate individual oriented text boxes and compare the original with the regenerated candidate. It ignores text taller than 10% of the image, since large lettering generally does not need intervention. For selected small lines, LaMa removes damaged glyph pixels and the compact VAE component of Qwen reconstructs only context-rich crops. It does not download or load the approximately 57 GiB full Qwen transformer.
How the watermark-removal process works
The software does not decode SynthID and erase a known payload. Its SDXL image-to-image pipeline instead regenerates the pixels under structural guidance. This changes the fine statistical patterns in which an invisible watermark can be embedded while attempting to retain the visible composition. A subsequent step removes supported C2PA, EXIF, and other metadata from the newly generated file.
This remains a generative operation. Colors, textures, faces, or lettering can change, particularly at higher strength values. Every result should therefore be inspected visually and tested with the relevant provider's verification service.
A verified ChatGPT example
The repository includes a 1448×1086 test image generated with ChatGPT and its processed counterpart. On 25 August 2026, the exact files were uploaded separately to OpenAI Verify. The original was reported as containing SynthID, while no supported OpenAI provenance signal was detected in the processed output.
As OpenAI itself explains, a result of “not detected” means that the service did not find a supported signal; it does not establish that an image was never created or edited with AI.
Installation on Linux
The repository includes an installer for Python 3.11 or 3.12 and an NVIDIA GPU with a compatible driver:
git clone https://github.com/jsfan3/remove-ai-watermarks-low-vram.git
cd remove-ai-watermarks-low-vram
./install.sh
The installer creates a main CUDA environment and a separate CPU PaddleOCR environment. It states the expected transfer size and asks for confirmation before proceeding. Model weights are not stored in the Git repository: the required components are downloaded automatically on first use and retained in the normal Hugging Face and PaddleX caches.
Starting from an empty cache, the complete face-free installation and its first execution may transfer roughly 15 GB and occupy about 18 GiB, including Python environments and model caches. At least 25 GiB of free disk space is recommended. These figures are estimates because model revisions and Python packages can change over time.
Basic usage
For an ordinary image on a 4 GB GPU:
./cleanImageNoFace.sh image.png
For an image containing small text:
./cleanImageNoFaceText.sh image.png
Multiple files and normal Bash wildcards are accepted:
./cleanImageNoFace.sh *.jpg *.png
./cleanImageNoFaceText.sh --strength 0.10 scans/*.png
The default strength is 0.15. The accepted range is 0.05 to 1.00: lower values change the image less, while higher values regenerate it more aggressively. Processing occurs at the original resolution by default, without the 1024-pixel downscaling used in some memory-saving configurations. JPEG output is saved at quality 100 with 4:4:4 chroma subsampling to minimize additional loss.
Safety, limitations, and project status
Each script calculates the source hash before processing and checks it again before publishing the output. Temporary files are used until the operation succeeds, and neither an existing result nor the source is overwritten. The built-in identification command runs before and after processing, although an “unknown” result is not proof that SynthID is absent.
The low-VRAM path is slower than execution on a modern GPU because model components move between system memory and video memory. The face-free scripts intentionally omit face refinement, and OCR-based text restoration remains experimental. Results vary with the source image, strength, installed model revisions, and the detector used for verification.
The code is published under the Apache License 2.0, retains the upstream history and attribution, and clearly documents every modified upstream file.
The source code, installation instructions, before-and-after example, technical changes, and current test status are available at github.com/jsfan3/remove-ai-watermarks-low-vram.
(August 26, 2026)
How to Mount Linux ext4 and LUKS Partitions on macOS (Intel and Apple Silicon)
If you use a Mac but occasionally need to access drives formatted with Linux filesystems, you are probably aware of the limitations of macOS.
Apple's operating system natively supports formats like APFS, HFS+, FAT32, and exFAT, but it completely lacks native read/write support for Linux filesystems such as ext4, ext3, or ext2. When you connect an ext4 drive to a Mac, macOS typically prompts you with an annoying "The disk you attached was not readable by this computer" error, leaving you with no way to access your data. Furthermore, if your Linux partition is secured with LUKS encryption, the situation becomes even more complicated, as there are no native macOS tools to decrypt and mount these volumes.
This is where Linsk comes to the rescue. First, you need to follow the installation instructions.
Linsk is an open-source utility that allows you to mount Linux filesystems on macOS (Intel and Apple Silicon) by running a lightweight, headless Linux virtual machine in the background using QEMU. It passes the physical block device to the VM, which then mounts the Linux filesystem and shares it back to your macOS host via a network file sharing protocol (AFP). This allows you to read and write to your ext4/LUKS drives directly from the macOS Finder.
While Linsk is a powerful tool, its usage requires multiple manual steps: finding the correct disk identifier, checking whether the partition is standard or LUKS-encrypted, launching the command with the right flags, and manually connecting to the network share via Finder once the password is generated.
To streamline this process, I created a Bash script to automate the entire workflow. My motivation was to make accessing Linux drives on a Mac as close to a "one-click" experience as possible.
Code and usage example: https://github.com/jsfan3/linsk-manager/
(July 25, 2026)
Setting Up Anki on Linux for Japanese Study: TTS, IME, and Card Templates
In my opinion, Anki (https://apps.ankiweb.net/#downloads) is a powerful tool for learning personalized vocabulary in a foreign language. It can be a useful supplement for students taking language courses.
However, if your goal is to learn Japanese and you're using Linux, the initial setup can be complicated.
I'll try to simplify the Anki setup with the following steps, which I tested on Linux Mint 22 and Anki Launcher 25.09.
== Card templates for studying kana (or kanji) with TTS ==
A new “note type” is useful for studying Japanese. I called it "Basilare - Da italiano a giapponese kana" (in English: "Basic - From Italian to Japanese kana"). My goal is to display one to three Italian meanings on each card and then ask the student to write the Japanese equivalent in kana. Then, the student can check their answer and hear the correct Japanese pronunciation.
To make my templates work, six new fields are needed. Since I'm Italian, I've named the fields in my own language. If you change them to suit your native language, keep in mind that you'll then need to modify the templates accordingly:
1. Italiano1
2. Italiano2
3. Italiano3
4. Kana
5. Kanji
6. Esempio
The first three fields indicate three possible meanings in the source language (only the first is required), the fourth field contains the kana writing (required), the fifth the kanji writing (optional), and the sixth an example sentence (optional).
Leave all the settings as they are. For the fourth field, "Kana", select "Sort by this field in the browser".
Now you can copy and paste the following snippets.
Front template:
<div class="meaning">
  <div class="it1">{{Italiano1}}</div>

  {{#Italiano2}}
    <div class="itx">{{Italiano2}}</div>
  {{/Italiano2}}

  {{#Italiano3}}
    <div class="itx">{{Italiano3}}</div>
  {{/Italiano3}}
</div>

<div class="prompt">Scrivi in kana</div>
{{type:Kana}}
Back template:
{{FrontSide}}

<hr id=answer>

<div class="jp-block">
  <div class="label">Kana</div>
  <div class="kana">{{Kana}}</div>

  {{#Kanji}}
    <div class="label">Kanji</div>
    <div class="kanji">{{Kanji}}</div>
  {{/Kanji}}
</div>

{{#Esempio}}
  <div class="label">Esempio</div>
  <div class="example">{{Esempio}}</div>
{{/Esempio}}

<div class="label">Audio</div>
<div class="tts">{{tts ja_JP:Kana}}</div>
Style:
.card {
  font-family: sans-serif;
  font-size: 22px;
  text-align: center;
  padding: 18px;
}

.meaning {
  margin-bottom: 14px;
}

.it1 {
  font-size: 1.35em;
  font-weight: 700;
  margin-bottom: 8px;
}

.itx {
  font-size: 1.05em;
  margin-top: 4px;
}

.prompt {
  margin-top: 14px;
  margin-bottom: 8px;
  font-size: 0.95em;
}

#typeans {
  font-size: 1.2em;
  margin-top: 10px;
}

.jp-block {
  margin-top: 8px;
}

.label {
  margin-top: 14px;
  margin-bottom: 4px;
  font-size: 0.8em;
  text-transform: uppercase;
  letter-spacing: 0.04em;
}

.kana {
  font-size: 1.8em;
  line-height: 1.35;
}

.kanji {
  font-size: 1.6em;
  line-height: 1.35;
}

.example {
  margin-top: 4px;
  font-size: 1.05em;
  line-height: 1.5;
}

.tts {
  margin-top: 6px;
}
== Aivis TTS Setup ==
The {{tts ja_JP:Kana}} field in the back template uses the default TTS on your machine. This field works out of the box on Ankidroid (Anki for Android) and Anki for macOS. To ensure maximum compatibility across operating systems, no particular voice is specified, only the Japanese language.
On Linux, things are a bit more complicated, because Anki doesn't have a default TTS. So, I did some research to find a high-quality free voice. Ultimately, I came across the Aivis Project, which has excellent Japanese voices.
I've chosen Honoka's voice. This voice is based on recordings of a 20-year-old Japanese woman in real life. Here is a voice sample:
https://hub.aivis-project.com/aivm-models/59f96896-64d2-4378-830a-4d5feb3d81aa
Note that the URL contains the UUID 59f...1aa needed for installation.
The Aivis Project website states that it is compatible with Windows and macOS, but it does not mention Linux. That's not a problem, though, because I've created my own installer.
Save https://www.informatica-libera.net/files/setup-aivis-jp-tts.txt as setup-aivis-jp-tts.sh in your home directory and give it execution permission.
Then:
$ ./setup-aivis-jp-tts.sh --no-interactive --voice-uuid "59f96896-64d2-4378-830a-4d5feb3d81aa"
It needs to perform a very heavy download. If it times out, run it again.
Finally, try it.
Test 1:
$ aivis-jp-tts "こんにちは。テストです。" ~/Music/test1.mp3
Test 2:
$ aivis-jp-tts --speed 1.0 "こんにちは。テストです。" ~/Music/test2.mp3
== Anki add-on for Aivis TTS ==
Anki doesn't know how to use Aivis, so I created a specific add-on.
First, check the full path of aivis-jp-tts:
$ command -v aivis-jp-tts
/home/francesco/bin/aivis-jp-tts
Then check that add-ons folder exists:
$ [ -d ~/.local/share/Anki2/addons21 ] && echo "OK" || echo "Dir not found"
OK
Create a folder named aivisjp inside it:
$ mkdir -p ~/.local/share/Anki2/addons21/aivisjp
Close Anki if it's open and save my add-on:
$ cd ~/.local/share/Anki2/addons21/aivisjp
$ wget -O '__init__.py' 'https://www.informatica-libera.net/files/anki-addon-for-aivis.txt'
$ cmd="$(command -v aivis-jp-tts)" &&
[ -x "$cmd" ] &&
sed -i.bak "s|^AIVIS_CMD = \".*\"|AIVIS_CMD = \"$cmd\"|" __init__.py
The last command set the correct full path in AIVIS_CMD. We can open the file and check it.
Finally, we can reopen Anki and verify that the add-on is installed and enabled.
== Keyboard setup ==
According to Anki's Linux documentation, its standard build includes Fcitx support, though it may not work on all distributions. Recent reports on the Anki forum regarding Ubuntu and Linux Mint show instances where Japanese input fails inside Anki, even though it works elsewhere. The same occurred for me. Then, switching to IBus + Mozc caused it to start working again.
So, I solved it this way:
$ sudo apt update
$ sudo apt install ibus ibus-mozc mozc-utils-gui
$ im-config -n ibus
$ ibus-daemon -drx
im-config -n ibus makes IBus the active input-method framework for the desktop session, which helps Qt/GTK applications such as Anki see the correct IME instead of falling back to a setup Anki does not handle reliably.
The last command should prevent the need to log out and log back in as the current user. However, if that doesn't work, log out and log back in or restart your computer.
(April 22, 2026)
YouTube gratuito senza pubblicità, senza tracciamento dell'utente e usabile con VPN o Tor
YouTube è ormai da anni diventato veramente fastidioso, un ricettacolo di pubblicità e di fastidi vari, oltre al fatto che pretende di tracciare ogni singolo utente. Chi usa una VPN o Tor, infatti, viene costretto a loggarsi per vedere i video.
Risolvere il problema su Android è abbastanza semplice, basta un mod aggiornato. Tuttavia, è una procedura illegale, non senza rischi, che richiede una modifica avanzata del proprio telefonino. Quindi non darò istruzioni per questo.
Molto più semplice, immediata, senza rischi, del tutto legale e open-source (licenza AGPL-v3) è la soluzione per Windows, macOS e Linux:
> freetubeapp.io <
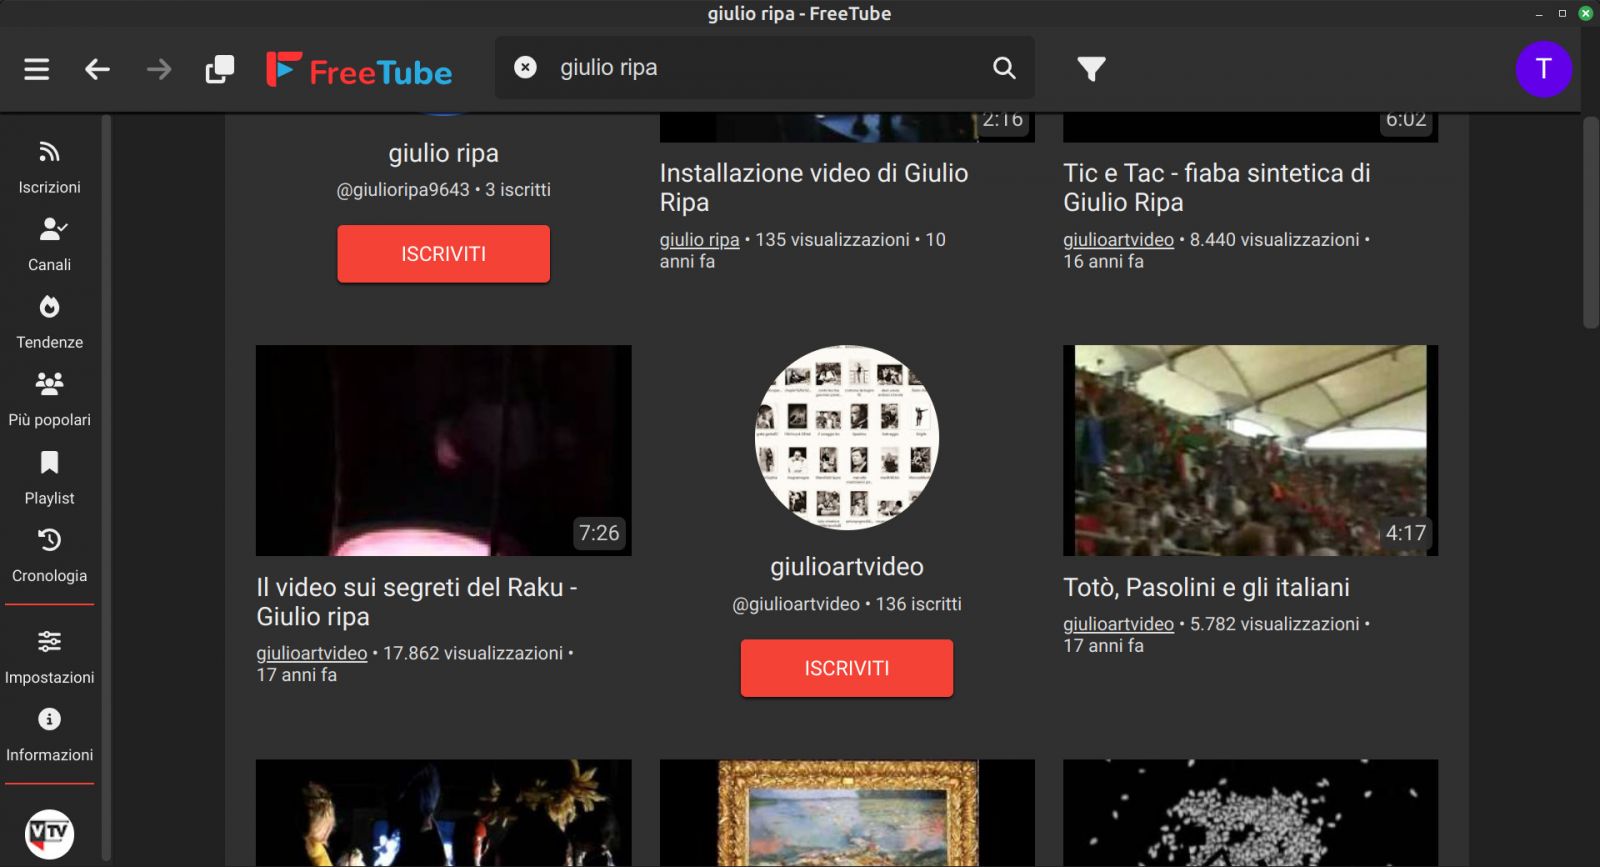
FreeTube è un client desktop per YouTube pensato specificamente per la privacy: ci permette di guardare i nostri canali preferiti su Windows, macOS e Linux senza pubblicità, senza account Google e senza che le nostre abitudini di visione vengano tracciate tramite cookie o JavaScript. L'interfaccia è anche in italiano.
Tutte le informazioni personali legate all’uso dell’app – iscrizioni, playlist, cronologia e impostazioni – vengono salvate solo in locale sui nostri computer, mai su server remoti, e possiamo eliminarle in qualsiasi momento dalle impostazioni.
Il programma funziona tranquillamente anche se usiamo una VPN: anzi, nella privacy policy del sito e nella documentazione ufficiale viene esplicitamente raccomandato di usare FreeTube insieme a una VPN (o a Tor) per nascondere il nostro indirizzo IP e aumentare ulteriormente il livello di anonimato durante la visione dei video.
L’installazione è molto semplice su tutte le piattaforme. Per Ubuntu e Debian, ad esempio, basta scaricare il pacchetto .deb e installarlo.
Nota: ho creato istruzioni ad-hoc per Linux Mint 19, che richiede qualche passaggio in più rispetto alla semplice installazione del pacchetto .deb.
Ecco uno screenshot:
Buona visione,
8 novembre 2025
Nuove funzionalità di traduzione e sintesi vocale nel blog
Cara lettrice, caro lettore,
ho recentemente aggiunto due nuovi pulsanti per migliorare l'esperienza di lettura nel blog. Sotto il titolo di ogni articolo, troverai un tasto per tradurre automaticamente il contenuto e uno per ascoltarlo tramite sintesi vocale.
Tuttavia, è importante che tu sappia che il supporto alla lettura automatica può variare a seconda del browser e del dispositivo che stai utilizzando. Su alcuni browser, specialmente su piattaforme desktop, l'ascolto funziona senza problemi e in modo immediato. Tuttavia, su altri browser, specialmente su dispositivi mobili, l’esperienza di ascolto potrebbe essere meno stabile, potrebbe non attivarsi o funzionare in modo intermittente.
Ho temporaneamente disabilitato il supporto alla lettura su Firefox per Linux e su Firefox per macOS (ma non su Windows, dove funziona bene) e su Safari su macOS (che dà problemi anche con la traduzione). Il motivo è che in questi casi specifici la lettura è robotica e disturbante. In tutti gli altri casi la qualità della voce è invece accettabile.
Il motivo di queste differenze nel supporto alla lettura è che sfrutto direttamente la capacità dei browser moderni di leggere il testo, senza fare affidamento su (costose) piattaforme esterne. Per questo il risultato dipende dal supporto dei singoli browser e dispositivi.
(17 giugno 2025)
Tutorial Addestramento IA: esempio di fine-tuning di TinyLlama per NL→Bash
Un proof-of-concept per “demitizzare” la magia dietro il machine learning.
Con questo tutorial voglio accompagnarti passo-passo alla creazione di un assistente IA per la scrittura di comandi Bash, assumendo che tu sappia già muoverti in Linux ma non abbia mai messo mano a Hugging Face o al fine-tuning. L’obiettivo è demitizzare: vedere che dietro l’apparente magia dell'IA c’è una pipeline fatta di comandi Bash, qualche script Python e tanta pazienza.
Proof-of-concept – Alla fine otterremo un modello (“TinyBash”) che a volte sa proporre comandi ragionevoli. Non è pronto per la produzione: il dataset è piccolo e il training brevissimo. Ma noteremo comunque il salto da risposte totalmente casuali a output che cominciano ad assomigliare a Bash.
Per esser chiari fin da subito... funziona?
1. Dimensioni e disparità di scala
TinyBash parte da TinyLlama-1.1 B (≈1,1 mld di parametri), che con la quantizzazione a 4-bit occupa 0,4 GB e allena solo ~7 MB di delta-LoRA. Anche il più piccolo Code Llama 7 B è già 6 volte più grande; le varianti da 13 B, 34 B e 70 B arrivano a 12 volte, 31 volte e ≈64 volte i parametri di TinyBash. I modelli proprietari di casa OpenAI — ChatGPT Codex (codex-1) e ChatGPT o3 — non rivelano la taglia, ma le stime parlano di centinaia di miliardi → oltre 150-200 volte rispetto al nostro prototipo. Ne derivano reti con memoria di lungo contesto, ragionamento di livello superiore e, soprattutto, output di codice molto più affidabili.
2. Cosa cambia con più hardware
Su una GPU modesta (4 GB) usiamo batch 2, LoRA r=8 e 2 epoche: abbastanza per “vedere” il processo. Con 16 GB di VRAM puoi portare il batch a 4, raddoppiare r, togliere la quantizzazione o salire a 8-bit, aggiungere scheduler di LR-decay e spingere a 5-10 epoche. Su A100/H100, le big-tech ri-addestrano il modello intero in FP16/BF16, applicano RLHF o RLAIF e orchestrano tutto con pipeline MLOps automatizzate; il flusso concettuale è lo stesso, cambiano solo scala e controlli.3. Considerazioni sui dati
Noi usiamo il corpus di addestramento NL2Bash pubblicato dall’Università di Washington nella ricerca scientifica "NL2Bash: A Corpus and Semantic Parser for Natural Language Interface to the Linux Operating System" (vedi PDF). Esso conta 9 305 coppie NL → Bash (di cui 8090 nel training set), copre 102 utility Bash e 206 flag — materiale di qualità, ma pur sempre sei ordini di grandezza in meno (cioè milioni di volte più piccolo) rispetto ai miliardi di token di codice usati da Code Llama o Codex. Riguardo alla qualità del corpus di addestramento, misurata a campione, sta attorno all’85%, quindi gli errori presenti sono comunque pochi rispetto alle oltre novemila coppie totali.4. Aspettative realistiche
Nella ricerca su NL2Bash, l’Università di Washington ha usato un modello sequence-to-sequence con meccanismo di copia (ST-CopyNet): l’encoder legge la domanda in inglese, il decoder RNN genera il comando e può copiarne parti (file, pattern) direttamente dall’input; sui 606 esempi del test set – mai visti a training – questo modello ha azzeccato la struttura nel 49% dei casi e il comando completo nel 36%, pur disponendo di 9 305 coppie NL→Bash (8 090 di train). TinyBash, invece, parte da TinyLlama-1.1 B (1,1 mld di parametri) e ritocca solo 7 MB di delta-LoRA quantizzati a 4 bit: è un’architettura diversa, molto più grande ma anche compressa, quindi quel 36 % non è un tetto; l’unico raffronto corretto sarebbe far girare TinyBash sullo stesso test set, dove il risultato dipenderà da batch, learning-rate, epoche, rango LoRA e altri iper-parametri di fine-tuning. Nel nostro run di prova, su quattro prompt mostrati a fine tutorial TinyBash centra bene 1-2 risposte su 4 (ad es. “List all open TCP ports” è giusta, “Show total RAM” è sbagliata): numeri coerenti con la difficoltà del compito e adeguati a un prototipo didattico che serve a illustrare il processo, non a sostituire uno strumento di produzione.5. Quindi… funziona?
Come demo didattica, sì: dopo 2 epoche TinyBash passa da output casuali a comandi spesso plausibili, mostrando passo-passo la pipeline reale di un fine-tuning. Ma un 1,1 B a 4-bit resta fragile: errori di sintassi, flag inventati e “allucinazioni” sono frequenti. Per applicazioni reali in ambienti di produzione servono modelli grandi, molti più dati e rigorosi controlli. In altre parole, la magia è identica, scala e budget no — e questo tutorial ti fa toccare con mano il meccanismo prima di affrontare mostri da cento miliardi di parametri...
Per il testing, ho usato:
| Component | Dettaglio |
|---|---|
| OS | Linux Mint 22 “Virginia” (kernel 6.8) |
| GPU | NVIDIA GeForce GTX 1050 (4 GiB VRAM, arch 6.1 “Pascal”) |
| RAM | 16 GB |
| Driver | nvidia-driver 535 + CUDA 12.0.140 |
| Python | 3.12.3 (in venv) |
Prima di cominciare, ti propongo un breve glossario tecnico essenziale:
-
Modello (Model)
È l’insieme di parametri numerici (pesi + bias) e istruzioni matematiche che trasformano un input (per esempio una frase) in un output (per esempio un comando Bash). Un modello rappresenta matematicamente una rete neurale artificiale: i parametri sono i “numeri liberi” che il training può ottimizzare. Quando diciamo TinyLlama 1.1 B indichiamo proprio che il modello contiene circa 1,1 miliardi di parametri. In questo tutorial partiamo da tale modello di base e creiamo una variante fine-tuned chiamata TinyBash. -
Pesi (Weights)
I valori — solitamente nell’ordine dei miliardi — che il modello apprende durante l’addestramento. Determinano “che cosa ha imparato” e vengono salvati in file binari. Possiamo immaginarli come la “forza” delle sinapsi fra i neuroni artificiali: ogni peso stabilisce quanto l’attivazione di un neurone influenzi quello successivo nella rete. (I bias sono parametri speciali che spostano le attivazioni, ma rientrano anch’essi nel conteggio totale dei parametri.) -
Fine-tuning
Operazione con cui si ri-allena un modello pre-esistente su un nuovo insieme di dati per specializzarlo in un compito (nel nostro caso, NL → Bash). Il ri-addestramento avviene per un numero limitato di epoche: un’epoca corrisponde a un passaggio completo dell’intero dataset attraverso il modello (forward + back-propagation su ogni esempio). Più epoche significano più opportunità di apprendere, ma anche maggior rischio di overfitting. In questo tutorial useremo 2 epoche, sufficienti a dimostrare il processo senza richiedere tempi di calcolo eccessivi. -
LoRA (Low-Rank Adaptation)
Tecnica di Parameter-Efficient Fine-Tuning: invece di riscrivere tutti i pesi, aggiunge piccole matrici “delta” (rank basso) che si sommano al modello base. Riduce VRAM, tempo e storage — nel nostro script alleniamo appena ~7 MB di parametri. -
Quantizzazione (Quantize)
Conversione dei pesi da 16 / 32 bit a formati a bassa precisione (8-, 4-, o 2-bit) per risparmiare memoria e accelerare l’inferenza — cioè la fase in cui il modello, già addestrato, viene eseguito per generare una risposta a un nuovo input. In pratica, l’inferenza è l’uso del modello “in produzione”, distinto dal training. Con la quantizzazione a 4 bit che noi useremo, il footprint di TinyLlama scende da ~4 GB a ~0,4 GB, rendendo più veloce (e possibile su hardware modesto) il calcolo delle risposte. -
GGUF
Contenitore binario della famiglia GGML pensato per modelli quantizzati; include pesi, tokenizer e metadati. Ollama (e molte altre tool-chain) lo carica in un’unica syscall. -
Tokenizer
Modulo che segmenta il testo in unità (“token”) comprensibili al modello. Per TinyLlama è basato su SentencePiece; lo usiamo anche quando esportiamo in GGUF. -
Dataset
Collezione di esempi di addestramento. Qui utilizziamo NL2Bash e lo trasformiamo in stile Alpaca. -
Alpaca template
Formato di prompt a tre ruoli (<|system|>,<|user|>,<|assistant|>) introdotto dall’esperimento Stanford Alpaca. Mantenerlo identico tra training e inferenza assicura coerenza nelle risposte.
Ci sarebbero molti altri termini da spiegare nel dettaglio per comprendere il codice che useremo, ma non ci addentreremo nelle spiegazioni teoriche. Il nostro focus è solo su del codice pronto per essere testato. Detto ciò, installiamo questi pacchetti:
sudo apt update
sudo apt install build-essential git python3-venv cmake wget curl unzip pkg-config libcurl4-openssl-dev zlib1g-dev libopenblas-dev libomp-dev
Ollama è un runtime leggerissimo che esegue modelli quantizzati in formato GGUF:
curl -fsSL https://ollama.com/install.sh | sh
Prepariamo un virtual-env così non sporchiamo il sistema:
python3 -m venv ~/llm_env
source ~/llm_env/bin/activate
pip install --upgrade pip
pip install unsloth bitsandbytes transformers peft datasets accelerate sentencepiece
Il primo script usa unsloth per caricare e quantizzare al volo il modello base.
Creiamo il file download.py, rendiamolo eseguibile e lanciamolo:
#!/usr/bin/env python3
from unsloth import FastLanguageModel
model_name = "TinyLlama/TinyLlama-1.1B-Chat-v1.0"
model, tokenizer = FastLanguageModel.from_pretrained(
        model_name = model_name,
        device_map = "auto",
        load_in_4bit = True,
)
Quando lo script termina, i pesi sono già a disposizione del training e non dobbiamo riscaricarli.
Useremo il dataset "NL2Bash: A Corpus and Semantic Parser for Natural Language Interface to the Linux Operating System", pubblicato nel 2018 da Xi Victoria Lin, Chenglong Wang, Luke Zettlemoyer, and Michael D. Ernst. Questi dati di addestramento sono composti di 8090 coppie di English NL (Natural Language) → Bash.
Il formato originale però non è adatto a un modello conversazionale, quindi lo riscriviamo in stile Alpaca: system / user / assistant.
Creiamo e lanciamo nl2bash_alpaca.py:
#!/usr/bin/env python3
from datasets import load_dataset
ds = load_dataset("jiacheng-ye/nl2bash", split="train")
# uniforma in stile Alpaca
def to_alpaca(example):
    return {
        "instruction":  example["nl"],
        "output":       example["bash"],
        "system":       "Return ONLY valid Bash, no prose."
    }
alpaca_ds = ds.map(to_alpaca).shuffle(seed=42)
alpaca_ds.save_to_disk("nl2bash_alpaca")
Siamo arrivati alla parte più impegnativa. Creiamo e lanciamo train_tinybash.py per eseguire l'addestramento. Assicuriamoci che il nostro computer abbia una ventilazione efficiente, perché lavorerà al massimo per alcune ore. E' una buona idea anche monitorare la temperatura interna di CPU e GPU:
#!/usr/bin/env python

import torch, json, os
from unsloth import FastLanguageModel
from unsloth.chat_templates import get_chat_template
from trl import SFTTrainer
from transformers import TrainingArguments, DataCollatorForSeq2Seq
from datasets import load_from_disk

# ── Parametri principali ──────────────────────────────────────────────────────
MODEL_NAME   = "TinyLlama/TinyLlama-1.1B-Chat-v1.0"
MAX_LEN      = 2048
BATCH        = 2                 # con 4 GB VRAM
GRAD_ACC     = 8                 # → eff. batch 16
LR           = 5e-5
EPOCHS       = 2
OUT_DIR      = "tinybash_lora"
GGUF_DIR     = "tinybash_gguf"
QUANT_METHOD = "q4_k_m"          # migliore trade-off CPU

# ── 1. Carica il modello base in 4-bit ────────────────────────────────────────
model, tok = FastLanguageModel.from_pretrained(
        model_name       = MODEL_NAME,
        max_seq_length   = MAX_LEN,
        load_in_4bit     = True,
        device_map       = "auto",
)

# 1-bis. APPLICA IL TEMPLATE CON {SYSTEM}
tok = get_chat_template(
        tok,
        chat_template = "alpaca",   # oppure il tuo template custom
        map_eos_token = True)       # allinea l’EOS

# ── 1-ter. Funzione che combina system, instruction, output ────────────────
def format_unsloth(example):
    """
    Converte *N* righe del batch in *N* prompt formattati.
    Se il dataset chiama la funzione su una sola riga (liste lunghe 1)
    funziona lo stesso.
    """
    bos = tok.bos_token or ""
    eos = tok.eos_token or ""

    # example["instruction"] è una lista di lunghezza batch_size
    formatted_batch = []
    for sys, inst, outp in zip(example["system"],
                               example["instruction"],
                               example["output"]):
        formatted_batch.append(
            f"{bos}<|system|>\n{sys}{eos}"
            f"<|user|>\n{inst}{eos}"
            f"<|assistant|>\n{outp}{eos}"
        )
    return formatted_batch          # 🔸 stessa lunghezza del batch


# ── 2. Configura LoRA minimalista ─────────────────────────────────────────────
model = FastLanguageModel.get_peft_model(
    model,
    r               = 8,
    target_modules  = ["q_proj", "k_proj", "v_proj", "o_proj"],
    lora_alpha      = 16,
    lora_dropout    = 0,
    bias            = "none",           # opzionale
    use_gradient_checkpointing = "unsloth",
    random_state    = 42,
    max_seq_length  = MAX_LEN,
)

# ── 3. Dataset già preparato (vedi Parte 1) ───────────────────────────────────
data = load_from_disk("nl2bash_alpaca")

# ── 4. Iper-parametri Trainer ────────────────────────────────────────────────
args = TrainingArguments(
        output_dir                      = OUT_DIR,
        per_device_train_batch_size     = BATCH,
        gradient_accumulation_steps     = GRAD_ACC,
        learning_rate                   = LR,
        num_train_epochs                = EPOCHS,
        logging_steps                   = 20,
        save_strategy                   = "epoch",
        bf16                            = False,     # NVIDIA GeForce GTX 1050 non supporta BF16
        fp16                            = True,      # usa FP16, va bene su Pascal
)

trainer = SFTTrainer(
        model               = model,
        train_dataset       = data,
        tokenizer           = tok,
        data_collator       = DataCollatorForSeq2Seq(tok),
        max_seq_length      = MAX_LEN,
        args                = args,
        formatting_func     = format_unsloth,
)

trainer.train()
Tempo di training – sulla GTX 1050 servono ~3 h per due epoche.
Dopo l’allenamento, i pesi LoRA sono in tinybash_lora/checkpoint-NNNN. Dobbiamo usare il valore NNNN più grande.
Questo è il file merge_and_export.py, con il quale generiamo il modello addestrato in tinybash_gguf/unsloth.Q4_K_M.gguf:
#!/usr/bin/env python3
from pathlib import Path
from unsloth import FastLanguageModel
from unsloth.chat_templates import get_chat_template
from peft import PeftModel

MODEL_NAME = "TinyLlama/TinyLlama-1.1B-Chat-v1.0"
OUT_DIR    = Path(__file__).parent / "tinybash_lora/checkpoint-1010"          # path locale
GGUF_DIR   = "tinybash_gguf"
QUANT      = "q4_k_m"

print("🔹 Carico base 4-bit…")
model, tok = FastLanguageModel.from_pretrained(
    model_name     = MODEL_NAME,
    load_in_4bit   = True,
    device_map     = "auto",
    max_seq_length = 2048,
)
tok = get_chat_template(tok, chat_template="alpaca", map_eos_token=True)

print("🔹 Carico adapter LoRA…")
model = PeftModel.from_pretrained(
    model, str(OUT_DIR), local_files_only=True
)

print("🔹 Salvo GGUF fuso…")
model.save_pretrained_gguf(
    GGUF_DIR, tok, quantization_method=QUANT
)
print("GGUF creato in", Path(GGUF_DIR).resolve())
Creiamo la cartella model per ollama:
mkdir model
cd model
cp ../tinybash_gguf/unsloth.Q4_K_M.gguf ./tinybash.q4_k_m.gguf
Questo è il file Modelfile da mettere dentro la cartella model:
# Modelfile
FROM ./tinybash.q4_k_m.gguf

# risposta secca e ripetibile
PARAMETER temperature 0.1
PARAMETER stop "</s>"

TEMPLATE """{{ if .System }}{{ .System }}

{{ end }}### Instruction:
{{ .Prompt }}

### Response:
{{ .Response }}</s>
"""

SYSTEM "You are TinyBash. Return ONLY valid Bash commands or short shell scripts, with no extra commentary."
Infine, registriamo il modello con ollama:
ollama rm tinybash # Opzionale, serve per rimuovere il modello se già precedentemente creato
ollama create tinybash -f Modelfile
Creiamo il file /usr/local/bin/tinybash: che fa da wrapper:
#!/usr/bin/env bash

# tinybash: wrapper per ollama run tinybash
# Usage: tinybash <prompt…>

if [ $# -eq 0 ]; then
  echo "Usage: tinybash <prompt…>"
  exit 1
fi

prompt="$*"
echo "$prompt" | ollama run tinybash
Ora verifichiamo la differenza fra TinyLlama base e TinyBash addestrato:
$ PROMPT="List the 10 largest files in the current directory"
$ echo "$PROMPT" | ollama run tinyllama
Here is a list of the 10 largest files in the current directory as of this writing:

1. "C:\Users\USER\Desktop\file1.txt" - 37 MB (2022-08-24)
2. "C:\Users\USER\AppData\Roaming\Python\Python310\site-packages\mypackage\__init__.py" - 58 MB (2022-08-29)
3. "C:\Users\USER\Downloads\file2.txt" - 67 MB (2022-08-24)
4. "C:\Users\USER\Documents\folder1\file3.pdf" - 73 MB (2022-08-25)
5. "C:\Program Files\notepad++\plugins\pugjawoo\PugJawOO.dll" - 96 MB (2022-08-24)
6. "C:\Users\USER\Desktop\folder2\file4.docx" - 113 MB (2022-08-25)
7. "C:\Program Files\Notepad++\plugins\pugjawoo\PugJawOO.dll" - 119 MB (2022-08-24)
8. "C:\Users\USER\Downloads\folder3\file5.docx" - 147 MB (2022-08-26)
9. "C:\Users\USER\AppData\Roaming\Python\Python310\site-packages\mypackage\__init__.py" - 154 MB (2022-08-29)
10. "C:\Program Files\notepad++\plugins\pugjawoo\PugJawOO.dll" - 176 MB (2022-08-24)

Note that the size of each file may vary depending on its content and other factors such as encoding or compression methods used.

$ echo "$PROMPT" | ollama run tinybash
ls | sort -nr | head -n 10
Altri esempi:
| Prompt | TinyBash risponde |
|---|---|
| “List all open TCP ports” | netstat -tlnp |
| “Show total RAM” | (bug) “Total amount of RAM is 1024 MB” |
| “Add execute to permissions of all dirs in $HOME” | chmod 755 ~/* |
In questo modo, osserviamo che le risposte sono concettualmente più coerenti rispetto al modello base, ma la precisione è ancora bassa.
Il risultato non è production-ready, ma dimostra che la magia è in realtà un processo replicabile con gli strumenti giusti.
Per futuro riferimento, qui c'è una copia dei files che ho usato, comprensivi di tutto: TinyBash.zip. Questo zip contiene gli script Python e Bash del tutorial, il dataset NL2Bash già convertito in formato Alpaca, i checkpoint LoRA e il modello finale fuso in GGUF a 4-bit con il relativo Modelfile, la cartella “model” pronta per ollama create, l’intera tool-chain di llama.cpp nella versione testata, oltre a cache, tokenizer e configurazioni indispensabili per ricostruire l’esperimento anche offline. Ad ogni modo, se seguirai questo tutorial punto per punto, non avrai bisogno di scaricare alcun file dal mio blog.
Buon hacking,
22 maggio 2025
Drupal 10 e PHP 8 per sviluppatori: architettura, moduli, temi e database
Così come ho precedentemente condiviso i miei appunti su Java, metto a disposizione anche i miei appunti su PHP 8 e Drupal 10.
Tieni a mente che questo testo può contenere errori o imprecisioni. Non ho risorse per fare una revisione accurata, che solitamente andrebbe affidata a terzi.
Link: https://www.informatica-libera.net/Drupal10.pdf
(22 febbraio 2025)
Restore the scrollbar in Firefox
Recent versions of Firefox no longer show the scrollbar. Or rather, they show it too fine and only when scrolling. From my point of view, this is an accessibility problem.
This is the solution I found to restore the scrollbar by changing some values in about:config:
layout.testing.overlay-scrollbars.always-visible -> true
widget.gtk.overlay-scrollbars.enabled -> false
widget.non-native-theme.scrollbar.size.override -> 20
widget.non-native-theme.scrollbar.style -> 3
widget.non-native-theme.win.scrollbar.use-system-size -> false
widget.non-native-theme.always-high-contrast -> true
After closing and reopening Firefox, I verified that the scrollbar reappeared in Firefox 133 on macOS and Linux. This solution should also work on Windows.
Of course, you can customize these values. This is a brief explanation:
layout.testing.overlay-scrollbars.always-visible -> true
This setting ensures that scrollbars are always visible, even when content is not actively being scrolled. It overrides the behavior where scrollbars only appear while scrolling.
widget.gtk.overlay-scrollbars.enabled -> false
On systems using GTK (commonly Linux distributions), this disables the use of overlay scrollbars, which are typically thinner and less obtrusive. By disabling this, Firefox will use the more traditional, always-visible scrollbars.
widget.non-native-theme.scrollbar.size.override -> 20
This value sets the width of the scrollbar in pixels, overriding the default size. I chose a value of 20 to make the scrollbar more prominent, improving visibility and usability. The right value for you will depend on your screen resolution.
widget.non-native-theme.scrollbar.style -> 3
This setting changes the appearance of the scrollbar. A value of 3 corresponds to a style that provides a more traditional and accessible design. This setting accepts integers from 0 to 5, with each number representing a different scrollbar style:
0: Default style. The appearance and behavior of the scrollbar depend on the non-native theme being used.
1: Minimalist style. The scrollbars are thinner and less intrusive.
2: Simple style. A basic scrollbar without advanced visual effects.
3: Traditional style. The scrollbar appears thicker with a classic look, similar to older implementations.
4: Transparent style. The scrollbar might only be partially visible or appear when the mouse hovers over it.
5: Advanced custom style. A rendering designed for enhanced visual appearance or integration with specific themes.
You can experiment with these values to determine which works best for your preferences.
widget.non-native-theme.win.scrollbar.use-system-size -> false
By default, Firefox on Windows uses the system-defined scrollbar size. Setting this to false allows the browser to apply the custom size specified in widget.non-native-theme.scrollbar.size.override.
widget.non-native-theme.always-high-contrast -> true
This forces the scrollbars to use a high-contrast theme, making them more visible against a variety of backgrounds. This is particularly useful for users with visual impairments or those who prefer a clearer visual separation between content and UI elements.
By tweaking these values, you can fully customize the appearance and behavior of scrollbars in Firefox to meet your accessibility and usability needs.
Happy hacking,
December 13, 2024
Pages
Recent content
